Still not found answer to your query, contact our support team at
Footer of a website is very useful and is also an important tool to navigate within the site and distribute various information to the viewers of your website, but sadly this part is almost afterthought.
The information shown in footer should not be too heavy or with too much of graphics and designs. But, it should be simple and should convey the right information that can give your users an opportunity to discover the correct and important information on your website.
Advanced Footer plugin provides you various designs and options to display in the footer of your website which will help you in showcasing right information based on the type of user [logged in / non-logged in] on your website.
Please read more about this Plugin here: https://www.socialnetworking.solutions/social-engine/advanced-footer-plugin/
Watch demo here: https://demo.socialnetworking.solutions/members/home#global_footer
This tutorial will walk you through steps you need to follow to install the Advanced Footer Plugin on your website.
** This tutorial assumes that you are already logged in to the Admin Panel.
Installation and Setup of this plugin is very easy, but if you still need our expert to install this plugin for you, then you can purchase the service from here: https://www.socialnetworking.solutions/social-engine/socialenginesolutions-plugin-installation/
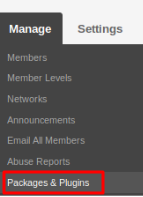
In the Main menu, click on the tab Manage and select “Packages & Plugins”.

Activate this plugin from Global Settings section of this plugin. In this section, you can do the Footer Styling Settings, can apply Footer Background Image and Choose the Footer Logo and can do some of the other settings also.
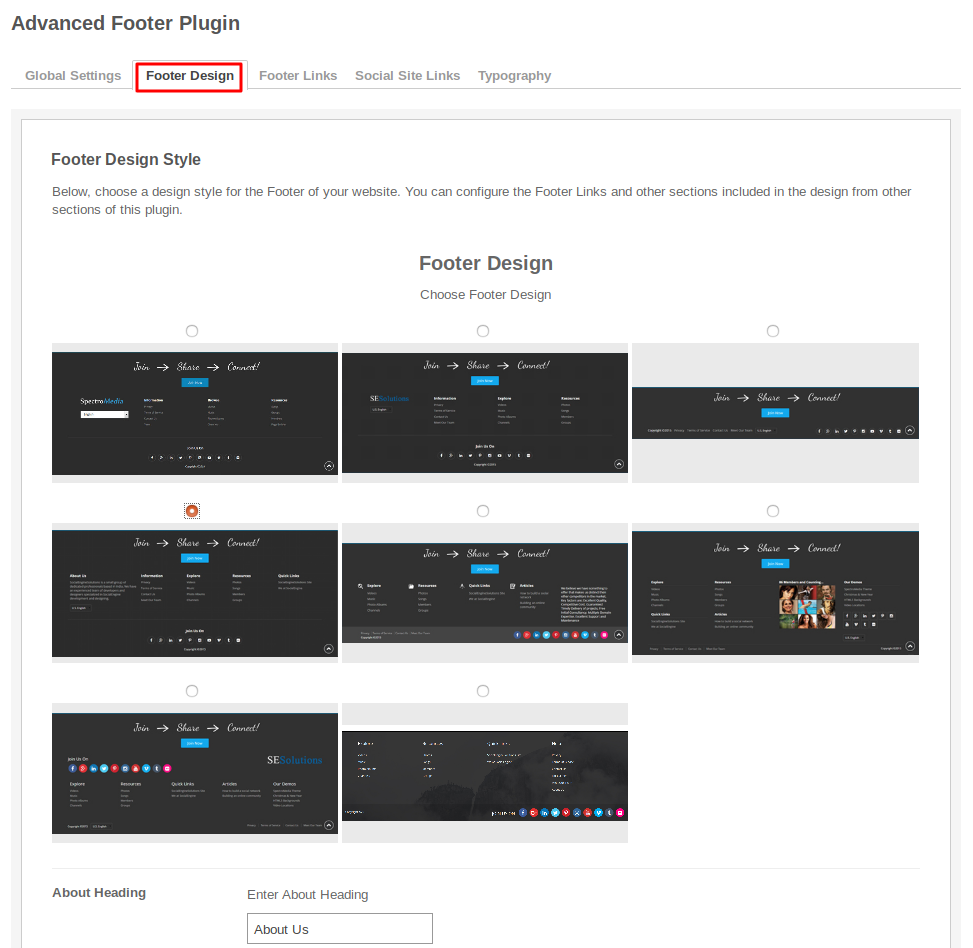
In this section, you can choose various Footer Designs according to your requirements and can do the required changes for the selected design.
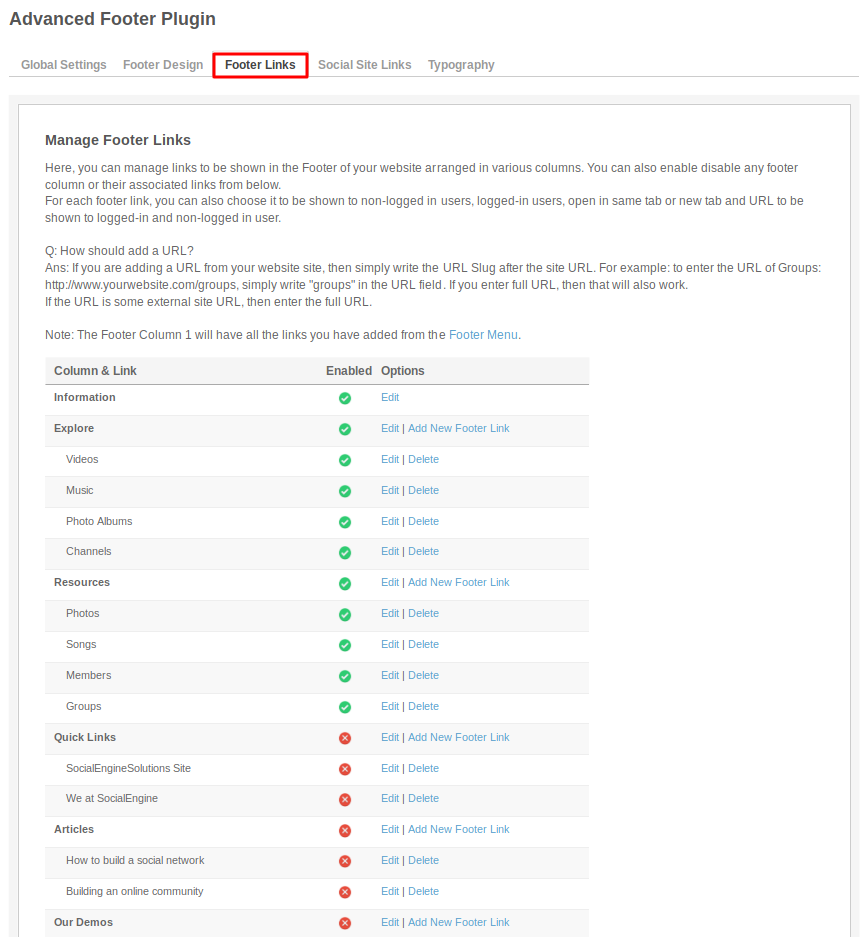
In this section, you can manage and add various links for your site which you want to be shown in footer. You can enable/disable the various given links from this section.
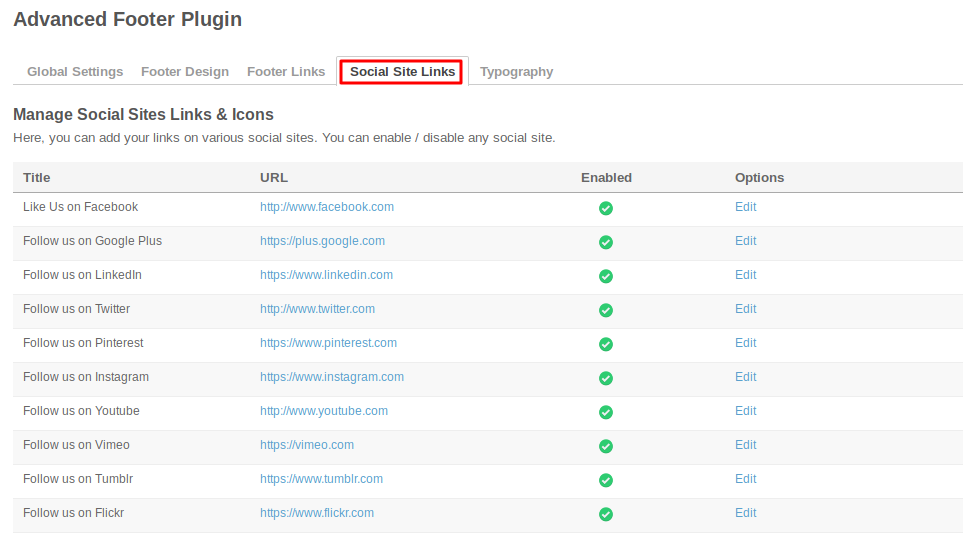
Under this page, you can add your contact links for the various social sites by clicking on edit option and can also enable/disable the social sites which you don’t want to show.
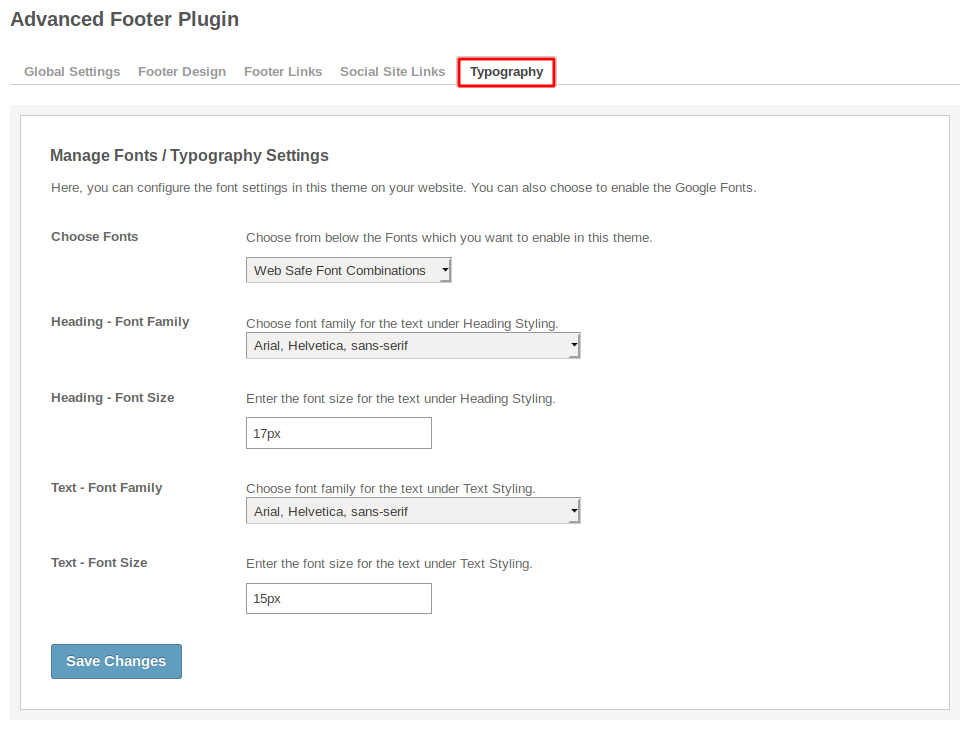
In this section, you can choose the font style and font size for the headings and text present in the footer.
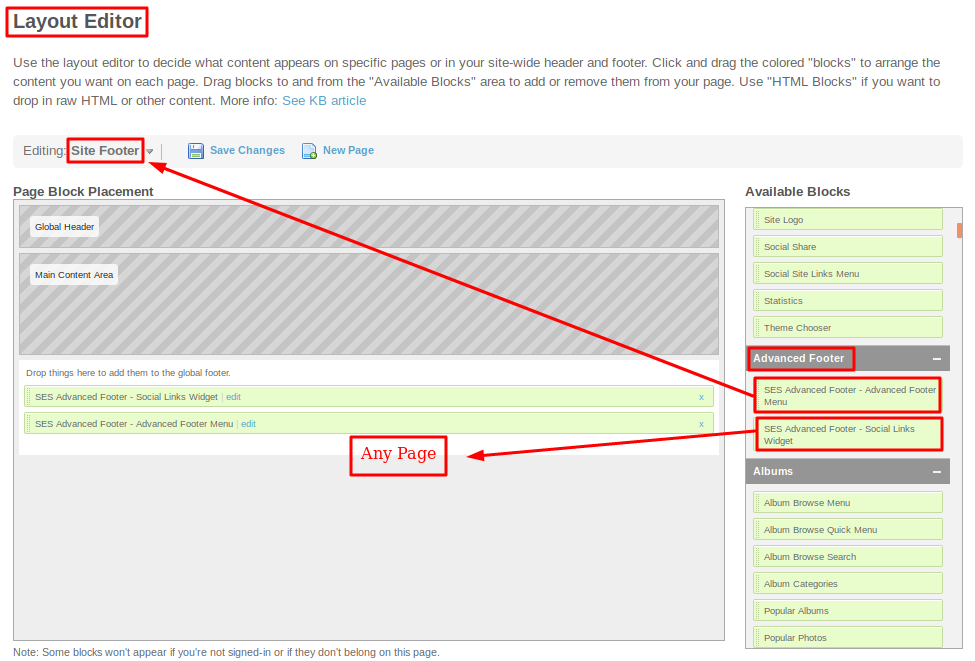
Layout Editor is the only place for our SES Products where you can place various widgets for your pages and configure those widgets according to your requirement as well.
This plugin contains two widgets, one is “SES Advanced Footer - Advanced Footer Menu” which is used to display the Advanced Footer and will placed on the “Site Footer” Page, second one is “SES Advanced Footer - Social Links Widget” which is used to display the links for various social sites and will be placed on any page.
Great! You have completed the installation and setup of this plugin and now you are able to change the footer of your choice.
Installation of this plugin is very easy, but if you still need our expert to install this plugin for you, then you can purchase the service from here: https://www.socialnetworking.solutions/social-engine/socialenginesolutions-plugin-installation/
We provide extremely cost-effective development, designing, customization, hosting and marketing without compromising on quality. We have strong domain experience in SocialEngine, Zend Framework, Mobile Apps, Web designing, E-Commerce, Application development and Product R&D – Making us ideally suited for outsourcing your IT needs!