Still not found answer to your query, contact our support team at
Firebase Cloud Messaging (FCM) is a cross-platform messaging solution that lets you reliably deliver messages at no cost. Using FCM, you can notify a client app that new email or other data is available to sync. You can send notification messages to drive user re-engagement and retention. You need to configure FCM for the Web Push Notifications by getting Project Server Key and Firebase Snippet Code which you need to enter in the admin panel of Web & Mobile Browser Push Notifications Plugin.
So, here are the steps which you need to follow to get the Firebase API Keys for Web & Mobile Browser Push Notifications plugin to work:
1. Go to the Google Firebase Console.
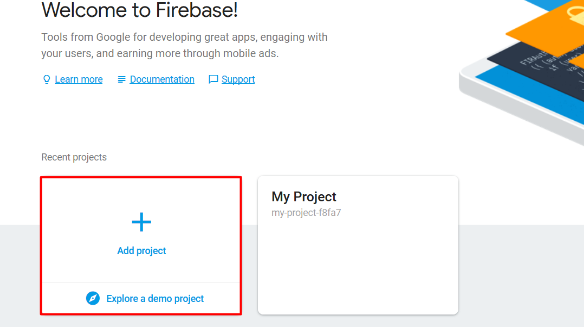
2. After Signing in into the Firebase Console, Click on “Add Project” Tab.
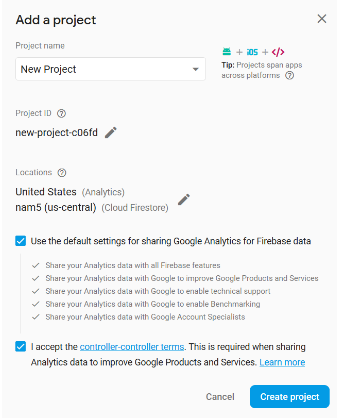
3. Enter the Project Name, select a Country and Cloud Firestore Location for creating the Project and then click on “Create Project” button.
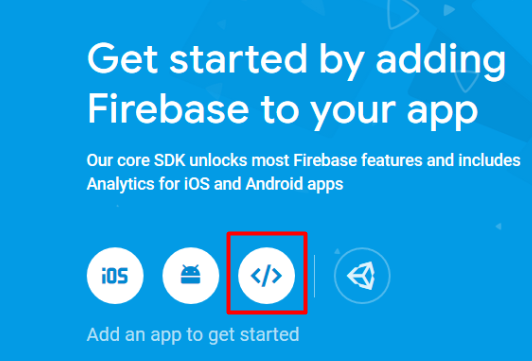
4. You will be redirected to Project console where you have to Click on the code Icon “</>”.
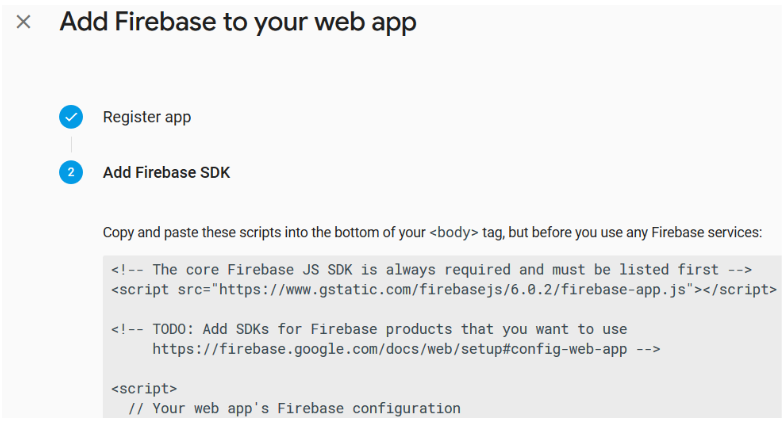
5. After that you have to “Add Firebase to your web app” by registering the App with the “Nickname”.
.png)
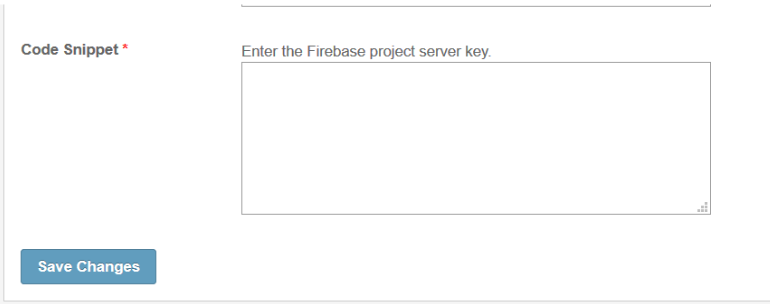
6. After registering the App, you will get FCM auth Snippet Code. Copy that Code and then paste in the “Code Snippet” field in the Admin Panel.
7. Go to the “API Settings” tab in the admin panel of this plugin and enter the code.
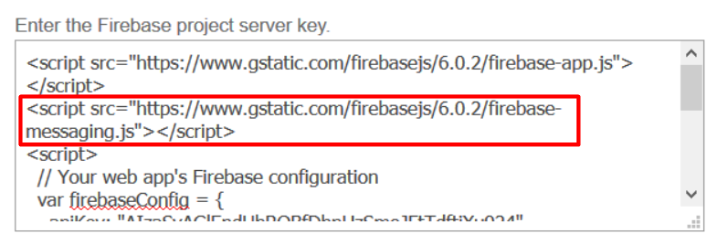
8. In the entered code, add the code without including double quotes: “<script src="https://www.gstatic.com/firebasejs/6.0.2/firebase-messaging.js"></script>” in the second line of your pasted Snippet Code as shown below:
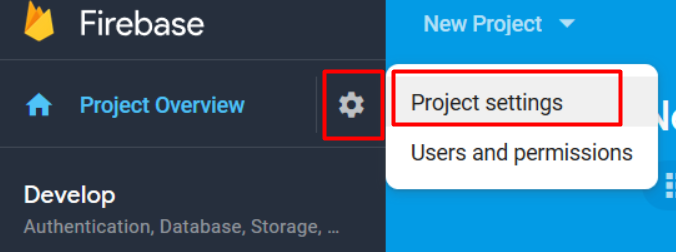
9. After that go to Project Console and Click on the gear icon next to Project Overview on the left side and then select “Project Settings”.
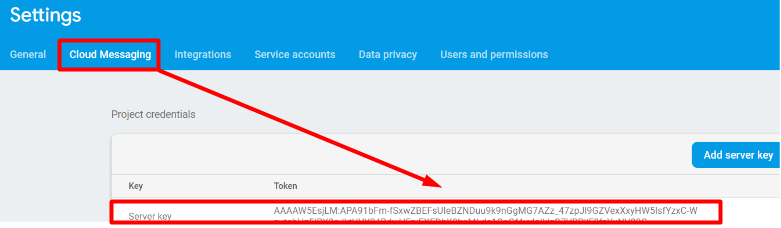
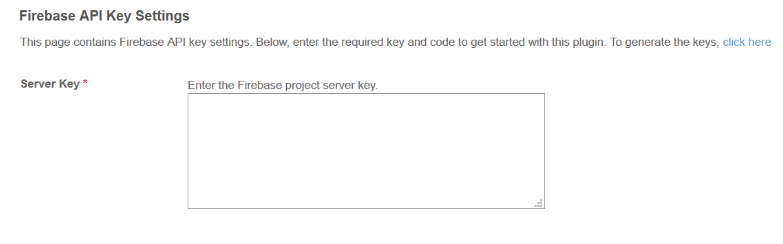
10. Switch to the Cloud Messaging tab and get the Server key and paste it in the “Server Key” field in the Admin Panel.
11. Again go to the “API Settings” tab in the admin panel of this plugin and enter this in the “Server Key” field.
12. After that click on “Save Change” button in the Admin panel of this Plugin.
You are good to send and receive push notifications on your website.
View Demo Read Read Detailed Description Buy this Plugin Now Buy from SE Store
We provide extremely cost-effective development, designing, customization, hosting and marketing without compromising on quality. We have strong domain experience in SocialEngine, Zend Framework, Mobile Apps, Web designing, E-Commerce, Application development and Product R&D – Making us ideally suited for outsourcing your IT needs!